SHOCK PRICES!!!
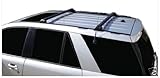
2002 - 2007 Saturn Vue Crossbars Roof Rack
parts for my car for LOW PRICES & COMPARE FOR BEST BUY ORDER DEALS CHECK NOW!!!...
NOTE Canadian customers: The Canadian Shipping fee includes all brokerage and toll fees. You will pay nothing on delivery if purchased with ATOMIXAUTO..../ 2002 - 2007 Saturn Vue Crossbars Roof Rack / parts for my car...Read more ************************************
- Securely haul items in on your Vue and help prevent damage to your interior. Extruded and die-cast aluminum means long-lasting, sturdy construction.
- 168 pound load capacity,. Do not exceed the weight capacity of your roof rack.
- Easily installs into the existing roof presets. NO DRILLING REQUIRED!
- Storage on top of vehicle permits more comfort/storage room inside
- Will not fit on Saturn Vue with chrome roof rails.
.../ 2002 - 2007 Saturn Vue Crossbars Roof Rack / parts for my car...Read more
++++++++++++++++++++++++++++
BEST DEALS 2002 - 2007 Saturn Vue Crossbars Roof Rack
parts for my car for 2011 SALES...
Product Brand : AtomixAuto
| Model : 50020
Product Rating : |
 |
Popular Rating : |
|
Reviews Rating : |
 |
Customer Rating : |
|
Available : In Stock
 See All Of Product Brand :
AtomixAuto
See All Of Product Brand :
AtomixAuto

2002 - 2007 Saturn Vue Crossbars Roof Rack
parts for my car
Guests who viewed this item also viewed......

2002 - 2007 Saturn Vue Crossbars Roof Rack
parts for my car for TOP PRODUCT FOR BUY & SALE OF THE YEAR :
2002 - 2007 Saturn Vue Crossbars Roof Rack
parts for my car
Special for
Best Deals Shopping for
 Customer Review :
2005 Vue installation experience : 2002 - 2007 Saturn Vue Crossbars Roof Rack
As you've no doubt gathered from the consistent comments about the instructions, they are really bad. I also have to report that one of the two crossbar extrusions was twisted a few degrees, making the mounts at each end out of parallel. Since no one else reported this I'll assume it isn't usually an issue and I just got *lucky*. Anyway, it wasn't enough to prevent me from getting it installed. Here's a rundown of the steps I took:
1. Decide which position to use for the rear bar based on what you'll be mounting up there. These crossbars can't slide forwards and back, so give this some thought and measurements. In my case it was a Sears hardshell cartop carrier (which I've had for years and recommend), which mounted using rear position 5.
2. Remove the 2 sets of screws from the two positions on the roof rails that you will be mounting to. You'll need the correct size allen wrench for this. Don't try to use the included tool, you'll strip the heads. You'll need a standard, not metric set.
3. Take the 2 long standoffs and put on a flat washer, apply some locktight, then screw them into the front mounting position.....which is the 3rd set of holes back on the rails. Use a socket to tighten, but be very careful not to over-tighten.
4. Take 2 short standoffs and put on a flat washer, apply some locktight, then screw them into the rear mounting position. Use a socket to tighten, but be very careful not to over-tighten. You'll notice that these standoffs end up recessed in the rails. Don't try to add more flat washers to the screw part of the standoff as this will not give you enough threads in the holes.
5. Assemble the mounts onto the crossbars using the self-locking nuts. The bolts don't reach all the way from the top, but instead are put in through the middle. The self-locking nuts go on the bottom with the pointed end down. hold them with your finger tip and the molded plastic seat will keep them from turning. Insert the supplied tool through the top hole to reach the bolt heads. Snug them up but don't fully tighten.
6. Mount the front crossbar using the short set of silver mounting screws (apply locktight), with lock and flat washers. Use the supplied tool and don't over-tighten.
7. On the rear mounts, do the same except that you'll use the longer mounting screws, and you'll need to put three flat washers between the standoffs and the mounts to compensate for the standoffs being recessed in the rails. Don't over-tighten.
8. Tighten up the bolts holding the mounts to the crossbars just enough to make them snug with no movement or rattle.
9. Attach the end caps with the setscrews. screw them in till the setscrews are flush....no further.
That's it. I was able to slide the rubber strip inward out of the way as I went along and then slide it back outward when done at each end. The end result looks good and appears to be solid. I'd say the value is very good on this product, and if you were smart enough to read this and the other helpful reviews you'll have no problems getting them installed. Give yourself about 90 minutes to do the job....2 hours worst case unless you manage to break something in the process.
jeepaxles-garagetoolsparts.blogspot.com is a participant in the Amazon Services LLC Associates Program, an affiliate advertising program designed to provide a means for sites to earn advertising fees by advertising and linking to Amazon.com
CERTAIN CONTENT THAT APPEARS ON THIS SITE COMES FROM AMAZON SERVICES LLC. THIS CONTENT IS PROVIDED ‘AS IS’ AND IS SUBJECT TO CHANGE OR REMOVAL AT ANY TIME.
Buy-Fishing Vest-Sport Shop Buy-Eclipse 1100-Best Shop